ScreenFloat 2: Power Up Your Screenshots

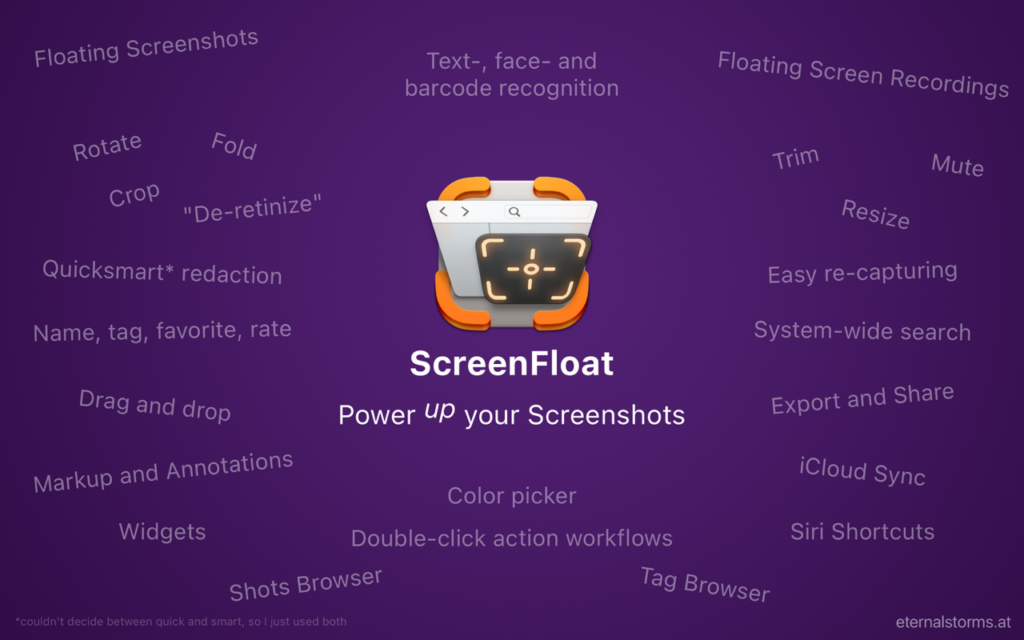
This week, MacSparky is sponsored by ScreenFloat 2, a major upgrade to the Mac’s built-in screenshot tool. With ScreenFloat 2, screenshots become so much more.

To begin, your screenshots will float, just like the name implies. You no longer have to dig through windows to find your screenshots. It’s right on top, waiting for you.

Then, there is a suite of screenshot tools: markup, annotate, colors, rotate, and trim. ScreenFloat 2 lets you record your screen and trigger screenshots on a timer. If you need to re-capture, there is a tool for that, so you don’t have to reframe the shot from scratch. You can even extract text and barcodes. If you need to redact, there are tools for that as well. You can remove text, faces, or barcodes. 

I often want to get exact color matches out of screenshots which is actually pretty difficult. But not so with ScreenFloat 2. The app has a built-in color sampling tool. If you want to use your screenshots, you can drag and drop them out of the browser, or directly from floating shots. ScreenFloat 2 also includes a browser to organize your images with folders and tags, and it all syncs over iCloud. If you want to use your screenshots, you can drag and drop them out of the browser.

Check out ScreenFloat 2 today and learn just how much more useful screenshots can be.

Unite 5 – Turn Web Apps into Supercharged macOS Apps (Sponsor)

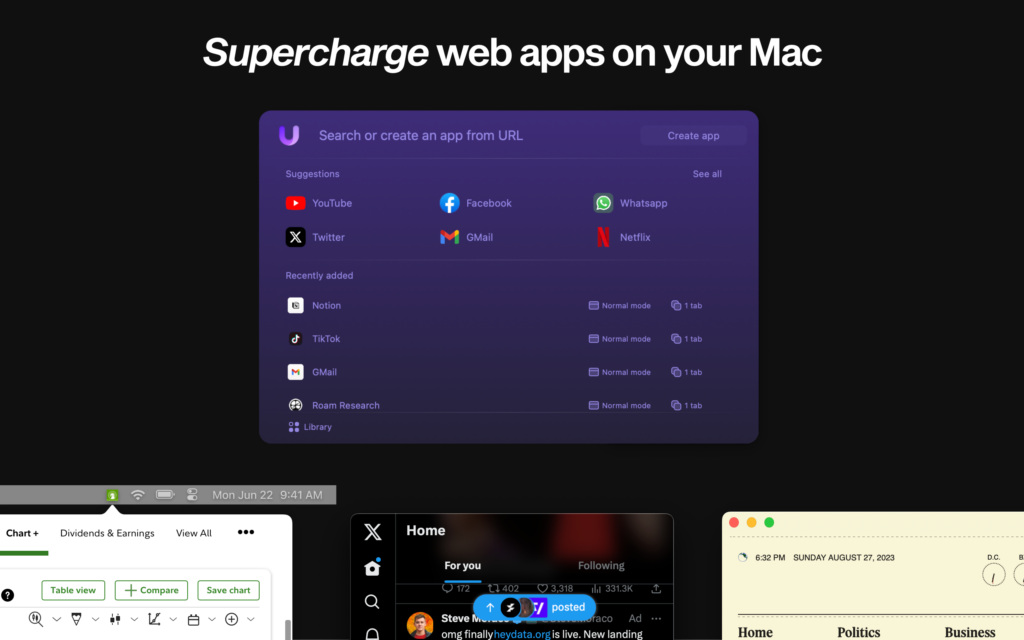
This week’s sponsor, Unite 5 for macOS, takes your web experience to the next level, transforming websites into feature-rich Mac apps. Powered by a completely redesigned WebKit browser, Unite 5 offers a more immersive and customizable browsing experience.

What sets Unite 5 apart? They’ve gone beyond just app conversion. Their new intricate link-forwarding rules give you unparalleled control over web interactions, making your web apps smarter and more integrated than ever before.

Some highlights of Unite 5:
Advanced Link-Forwarding: Navigate your web apps like a pro.
Revamped Browser Engine: Faster, more reliable, and tailored for macOS.
Enhanced Customization: More ways to make your web apps truly yours.

Create powerful web apps in seconds, such as:

  • A Gmail client that integrates seamlessly with macOS.
  • A resource-efficient Slack or Discord app with full notification support.
  • A dedicated AI app for ChatGPT or Claude.AI
  • A Robinhood or Figma app that feels native on your desktop.

MacSparky readers get an exclusive 20% off this week. Use the promo code ‘MacSparky’ at checkout or visit http://bzgapps.com/unitesparky.

Experience Unite 5 for yourself with a 14-day free trial, or access it as part of the Setapp subscription.

SoundSource: Sound Control So Good, It Should Be Built Into macOS (Sponsor)

This week, MacSparky is sponsored by SoundSource, a utility I use daily. The problem with the Mac’s native sound controls is that they are designed for people who need them once every few years. If you need to adjust your sound settings more than that, you need SoundSource.

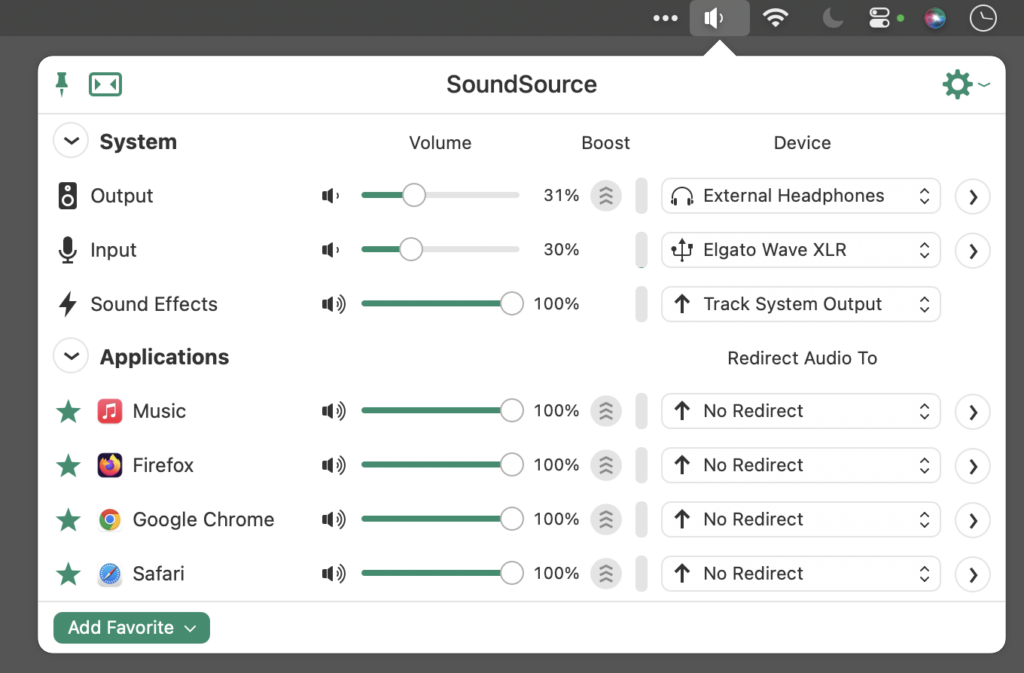
SoundSource is the sound settings controller that should be built in. Whether you listen to podcasts, blast music, or stream video, SoundSource is for everyone who uses audio on their Mac. It gives you per-app audio control, letting you change the volume of any app and route individual apps to different audio devices. Mute your browser, or send music to one set of speakers and everything else to another.

It doesn’t just give you sources; it also lets you apply effects to any audio on your Mac. Boost volume levels, add an equalizer, and even apply Audio Unit plugins. SoundSource also provides fast access to your Mac’s audio devices, so there’s no need to dig around in System Settings when you need to adjust things.

Main menu bar pull-down window for the SoundSource app from Rogue Amoeba, showing the various sections of the utility, along with 4 favorite apps, which have a green star to the left of their name.

If you have a DisplayPort or HDMI device that fails to offer volume adjustment, SoundSource can help there, too. It gives those devices a proper volume slider, and the Super Volume Keys feature also makes your keyboard volume controls work. And the best part is you don’t have to click through cryptic preferences boxes. With SoundSource you get all of these tools right in your menu bar.

And don’t forget, SoundSource is from Rogue Amoeba, which is the authority for sound processing on your Mac.

Best of all, through the end of February, MacSparky readers can save 20% by purchasing with coupon code SOUNDSPARK20. Learn more and download a free trial on the SoundSource site.

Record and Edit Your Audio with AudiOn (Sponsor)

A man wearing an open red shirt with a white T-shirt underneath. He is sitting, talking into a microphone, and wearing headphones. he is looking at the microphone, and has a tablet between his hands right behind him is a really big red circle signifying a record button, and behind that you can see a waveform in red with some smoke, on a black background. This image is a product shot for the AudiOn, a voice recorder for iOS and android.

This week I welcome a new sponsor to MacSparky: AudiOn, from the makers of Boom3D, an app that lets you record and edit audio easily on iPhone, and that gives you a lot of great editing options.

I record my voice a lot to capture thoughts, ideas for content, or anything else that comes to mind. AudiOn takes that experience to a whole new level. You can do a lot to bring your recordings to life once they’re captured. You can add some effects like reverb or use the built-in equalizer, blend your voice with music, and also edit and merge recordings. I can see AudiOn being used by podcasters, voice actors, or anyone that use their voice to create content.What impressed me the most after using the app to record my voice is how clear the recording is. I was also able to use the Voice Isolation feature right within the app. You can of course record any audio, not just your voice, and have access to a nice set of editing tools.Take your iPhone audio recording to the next level with AudiOn, available for free on the App Store (with optional in-app purchase).

Capture Your Ideas Easily with Whisper Memos

I’m pleased to welcome a new sponsor to MacSparky: Whisper Memos.

I love this app’s blend of utility and simplicity. You just open the app and start talking. It uses AI technologies to get an excellent transcription of your words, separated logically into paragraphs. You then get an email with an AI-generated subject line, so you’ve got your words captured with no extra effort. It’s that simple. You talk, and your words are reliably transcribed and captured.

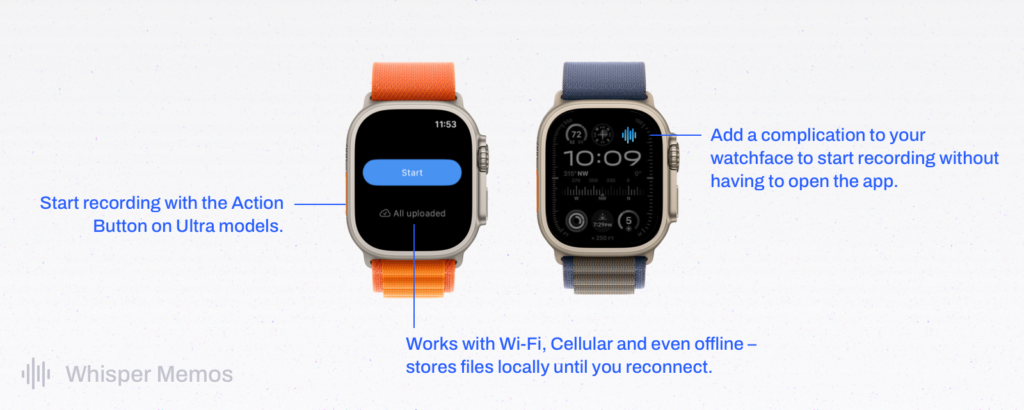
Whisper Memos also shines on Apple Watch, and if like me you’re sporting the Apple Watch Ultra, you can set the Action Button to start a recording in the app. You can also add a complication on your Watch face; no need to open the app, just tap and talk!

Behind the scenes, Whisper Memos is using OpenAI and GPT-4 to get the best possible transcription, and Google Firebase for authentication and data protection. You can opt out of storing your transcripts in your account, so Whisper Memos just sends them to your email and then dumps them, leaving no traces on their server

I’ve been using it (on Private Mode) for months now. It’s simple and incredibly useful. If you like to record your ideas and thoughts, I think you’ll love it, too.

Dropzone: One of My Favorite Mac Utilities

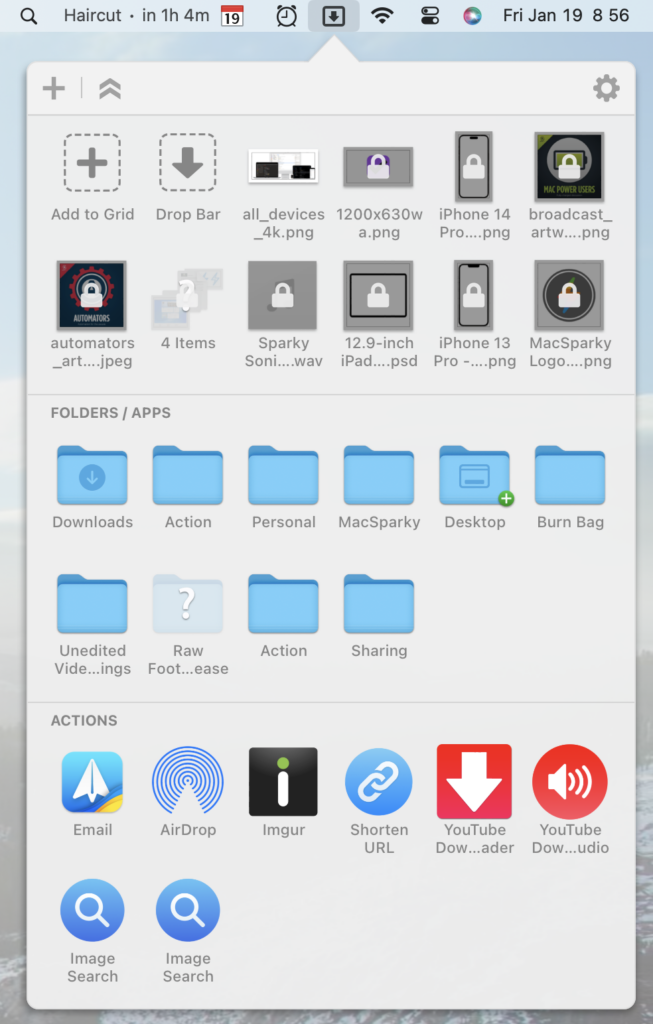
This week I’m welcoming back Dropzone as a sponsor at MacSparky. Dropzone is a productivity tool that enhances drag-and-drop on your Mac. Drag files onto the menu item and a beautifully designed and animated grid of all your actions opens. Share with services such as AirDrop, Imgur, FTP, Amazon S3, Facebook, X (Twitter) and many others. Move and copy files, launch applications, and even develop your own actions using the powerful Ruby-based scripting API.

With Dropzone, you can easily add actions to your grid with the new Quick Add menu or by dropping folders or apps onto the ‘Add to Grid’ area. Quickly reorganize your actions using drag-and-drop and delete them by holding the Option key. The new in-grid progress bars let you keep track of task progress. Also see how tasks are progressing at a glance in the new animated menu item.

Drop Bar has another great feature: Drag files you know you’ll need later onto the Drop Bar area of the grid to stash them temporarily. Drag stacks on top of each other to combine them. You can even drag a stack onto another Dropzone action.

One of my favorite new features is Add-on Actions, where you can add pre-configured actions to Dropzone. Want to resize files, search images, download from YouTube? Those actions (and a lot more) are available to you.

Dropzone menu bar icon with its window revealed, showing the various files saved to it.

I use Dropzone daily. Here are just a few things I do with Dropzone:

  • I keep some of my most commonly used image files (MacSparky Logo, podcast artwork) permanently saved in Dropzone. Anytime I need them, they are there waiting for me.
  • Often I’ve got temporary files when working on a project. I put them on the DropBar in Dropzone so I can use them as needed.
  • When working on my laptop and I’ve got apps in full-screen mode, Dropzone hold any attachments I need to move between files.
  • When I want to keep a YouTube video, I drop it on the Dropzone YouTube downloader.
  • I’ve set certain folders as repeating Dropzone targets. Now I can move files to my Action folder or copy items to the Desktop with just a drag.

I’m a big Dropzone fan and happy to have them as a MacSparky sponsor. Check it out today.

Fantastical: The Superhero of Calendar Apps (Sponsor)

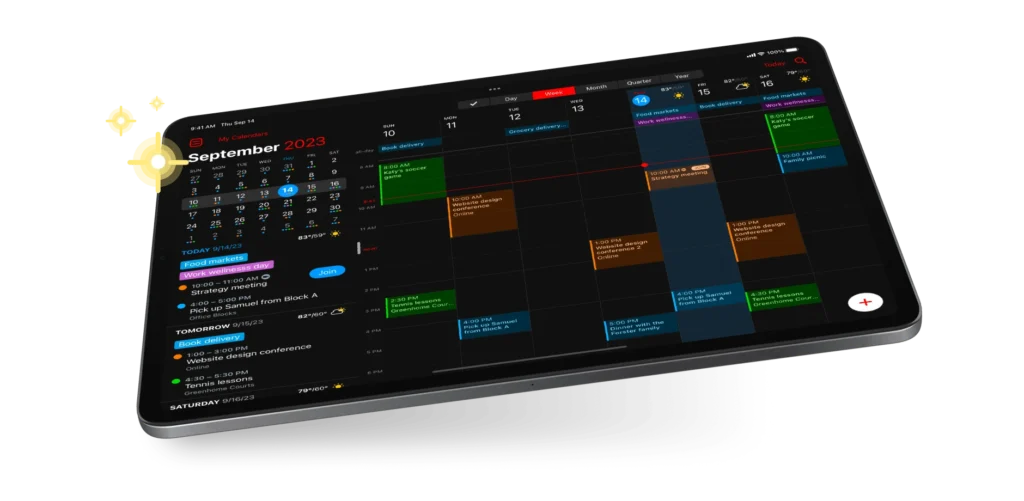
I’m thrilled to once again have Flexibits’ fantastic calendar app as a MacSparky sponsor. 2023 was a busy year for the Fantastical team and that meant users got a ton of great improvements. I use Fantastical every day at MacSparky HQ and I keep being blown away by how much it can do for me.

This is one subscription that gives me great value, and I’m happy to keep renewing. Flexibits published a nice video recap in December so you can see for yourself all the hard work they put in. For me, some features really landed and continue to make managing my calendar events and Zoom calls a breeze:

Openings and Proposals links got a lot better and I can now add contact details in the URL link.

Live Activities — for those of us with a Dynamic Island-equipped iPhone, seeing your upcoming Fantastical event in this prime spot is so handy, and you can get right to it with a tap.

In June, the Quarter view was added to the Mini Window on Mac. This is my favorite view in Fantastical and one that I’m convinced they added just for me.

With iOS 17 came interactive widgets, and SmartStack and StandBy widgets, too. Fantastical was ready, and took advantage of these new features in September. I use widgets all the time. They also made the Apple Watch app so much nicer and easier to use.

I could go on and on…but I think you’re getting it: Fantastical has never been better, and if you’re wondering whether it’s right for you, head over there now and give it a spin! Managing your events, tasks, and meetings has never felt as good.

Time Tracking Made Easy with Timing (Sponsor)

When it comes to time tracking, it’s only as useful as the data is accurate. Setting manual timers often leads to bad data. As humans, we’re not very good at throwing switches every time we mode shift. We’re in a new year and this would be a great time to start figuring out how you are spending your time.

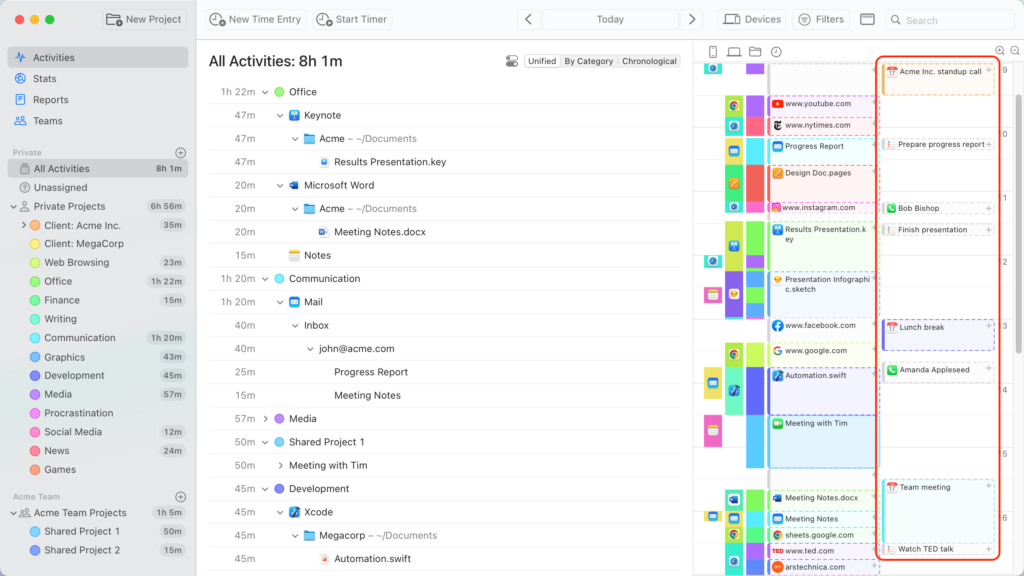
This week’s sponsor, Timing, gives you the benefit of time tracking without the inconvenience. Timing is an app for your Mac that automatically tracks your time. You don’t need to push buttons. Timing just does its job. It’s smart, it’s beautiful, and it’s easy to use.

Just download and install Timing, and it’ll start recording how much time you spend on each app, document, and website you use.

And now Timing will import your iPhone and iPad usage from Screen Time as well! This means you’ll get the complete picture of how you spend your time across all your devices.

If you haven’t tried Timing lately, you should. They added a new vertical timeline that is really nice. It’s easy to read and easy to edit. Time tracking gives me a lot of insight about where I am really putting my efforts. Timing is a great way to do it.

If you’ve tried time-tracking before and gave up on it, try Timing. It does the work for you. I’ve even made some videos showing how the app works.

Fix Your Photos with PowerPhotos 2.0 (Sponsor)

We’re heading into a new year, and I’m guessing over the holidays you took a few pictures. How’s your Photos library doing? If it’s anything like mine, it’s a mess right now. 

Did you know there is an app to help you out with that? PowerPhotos is here to the rescue.

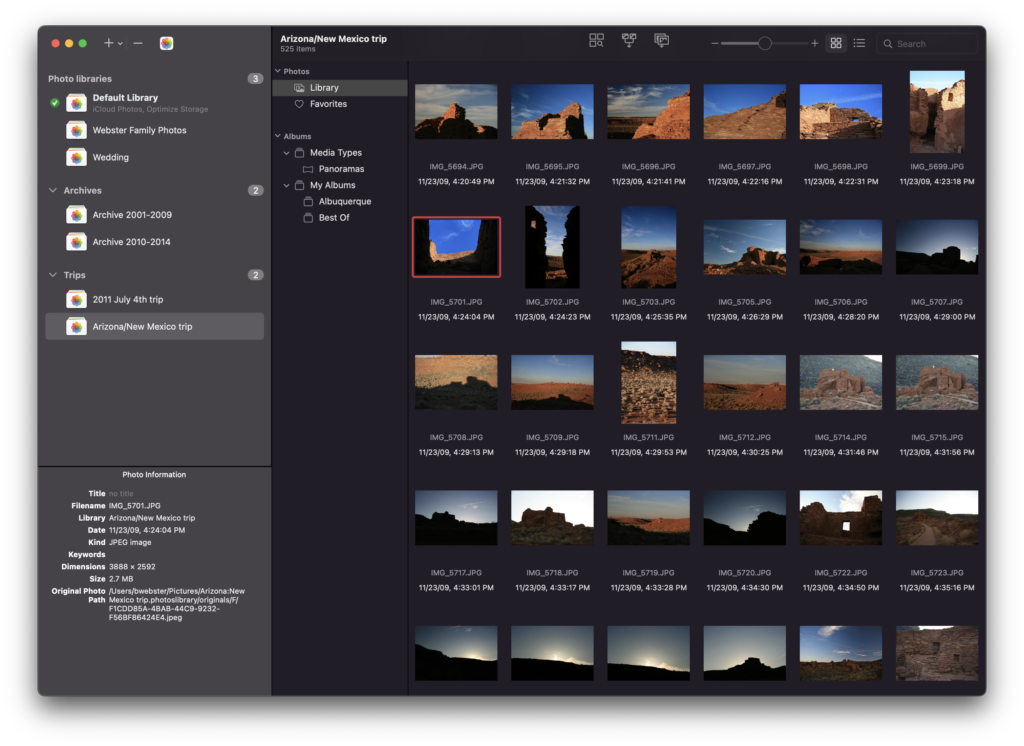
PowerPhotos works with the built-in Photos app on your Mac, providing an array of tools to help you get your photo collection in order. Find and eliminate duplicate photos, split up your library into smaller ones, merge libraries together, open libraries in separate windows, export photos/albums, and more. 

Best of all, PowerPhotos 2.0 is now available! There are some great new features in version 2.0: 

– Convert your old iPhoto or Aperture library to an equivalent Photos library
– Advanced export of photos/albums
– Full support for iCloud Photos
– New visual duplicate detection engine library groups
– Global menu bar item
– Multiple windows 

PowerPhotos adds all the features to Photos that Apple never will. You can download PowerPhotos for free to check it out, and purchasing a license will unlock all the features of the program. MacSparky readers can get a 20% discount with the coupon code MACSPARKY23, and existing iPhoto Library Manager and PowerPhotos 1.0 users can also use their old serial number to receive upgrade pricing, 50% of the normal price.

So make the Photos app work harder for you with PowerPhotos 2.0. You can get it today.